Showing posts with label Zomm B. Groom. Show all posts

Wednesday, August 11, 2010

A Wonderful Tale


The graveyard had been booked for a wedding on August the 8th, so this reporter’s Bride Z. Illa had to leave her Vera Wang gown hanging in the trees on the vines.

Her satin pumps were left resting on top of a tombstone, and her crown of violets and the hand-tied bouquet of exquisite flowers were placed with care in the mausoleum, so that the flowers remained fresh and perky.

Dapper Dan with his Dazzling Dentures, took off his wonderful tattered Armani jacket, loosened his bow tie and set down his walking stick.

He placed his fedora on top of the pumpkin and made himself comfortable for the night. After all, he had eternity to spend with his Bride!!!

The bridesmaids and groomsmen were not unhappy to have and extra night above ground.

Rhett scampered amongst the leaves and fallen debris in the graveyard, and the crow left the nest to perch on a nearby tree.

You see....Lisa, as wedding planner extraordinaire, had pre-booked Shady Rest Garden of Good and Evil for her bridal party last night.

And so, tonight is the night for this reporter’s wedding.

Weather:
Steamy and humid.
Thunderstorms are marching through.
The power has been out in the neighbourhood for most of the day (seriously).

The ceremony begins at 11:00 PM.

Instead of Kir Royal, the bride and groom have requested Vampire Clicquot Cocktails with a shot of Blood to toast their union. The caterer has prepared mushroom caps filled with spider legs, resting on a bed of bone dust.

No photos will be published of the event. The bride and groom have sold their story to People Magazine, so pick up your copy next week at your local checkout counter!

Plans for their wedding trip have not been announced.

Reported Anonymously by:
Susan


Friday, August 6, 2010

HI Guys

Sorry I have been away lately.  I haven't even finished reading the House #3 guide.  I'm so behind on the house anyway, I may return to the Groom this month and actually get him finished.  I will be in touch again soon.

Peggy

Thursday, July 29, 2010

No time!

Hi guys,

I haven't had time to stitch in the last few days.  I hope to do a little more work on the groom tomorrow before getting back to the Haunted House.

Peggy

Sunday, July 25, 2010

Cane and wedding rings


I've been working on the cane and started the double wedding ring background.   This guy is looking better every day.

I hope you all are well and enjoying stitching.

Peggy

Wednesday, July 21, 2010

Zomme B. Grum'e odds and ends


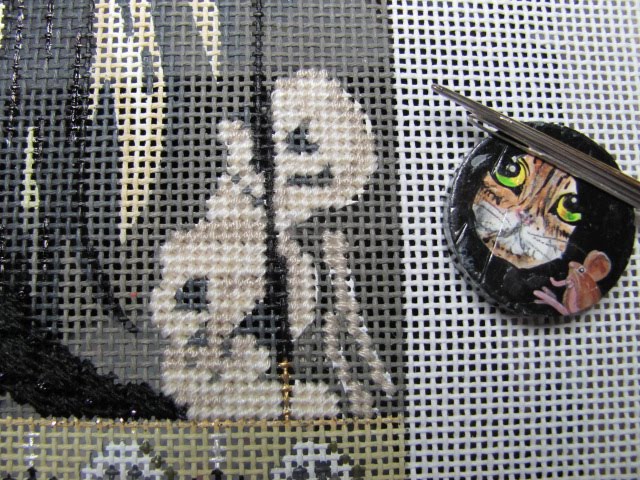
A few more areas are complete.  Here is the grooms left hand.  I covered the white and black threads here.  That wasn't in the guide, but I went by the pictures. (Thank goodness for the pictures.) I also finished the open stitch that is on the lower background.


Here is the pumpkin leaf and tendril.  They work up very quickly. There are four different threads used for these.  I have been getting out all of the threads needed for an area and threading them all up. It really speeds things up.

I love these little areas.  You get a quick feeling of accomplishment.

Tuesday, July 20, 2010

A tombstone to lean on.


Observe the finished tombstone.  Amy has added some more detail to the tombstone than is painted.  I put the photograph on my canvas so I could reference it easily.  It doesn't have to be exactly like hers.  Just get the jest of the shadows she is trying to create.  It is better to stitch the shadows before the satin stitches.  It works up quickly.  You can see that I have restored the pumpkin.  

A little stitching every day keeps Peggy very happy!  Stitch on.

Monday, July 19, 2010

Spiders and more!


My spiders are on the move.  I couldn't get them to all match like Amy's.  So I did the legs randomly and I really like the movement.  I finished the bottom row as well as the lower trame' line.  I have to wait until I stitch the background and the gravestone before I do the upper trame' line.  Well I could stitch it now, but I might tear it up as I stitch the surrounding areas. We've got 12 days left in July.  I am really pushing to finish this guy.  The next stage of the Haunted House will be going out at the end of the month.

Stitch on,
Peggy

Saturday, July 17, 2010

Grum'es Men


These Grun'es Men match the bridesmaids on the bottom of the Bride Z. Illa canvas.  They sit on a bed of a composite stitch which, like most of the stitches in this series, require excellent counting.  I did the square stitch first, then the other one.  But I had a thought later that it may have been easier to do the smaller stitch first.  As you start this section, ponder whether you should do the square stitch or the other one first.  You may stitch each area between the guys as a separate area.  At least I did.  I had tried to make the pattern work out as if the skulls are sitting on a perfectly counted out area. But each section looked better by putting the square stitch snug on the top left side of each skull.

Spiders next!

Thursday, July 15, 2010

The dog ate my homework!

Ok, I don't have a dog.  But I have a cat...who nicked the Neon Rays in the Grum'e's pants just as I was finishing them.  It happened when I flipped the canvas over to tie off the thread.  I couldn't even get mad at him.  He just wanted a little attention.

It affected one side of the pumpkin too.  So it is a little set-back.  My advice on the pants.  Count, count, count.  The color chart is invaluable.  Remember which color you are on in the graph as you go.  If you must stop for a while, stop with the needle up on top of the canvas, and in the middle of a row. And write down which color you have stopped on.  I promise, you will not remember it if you don't write it down, and then you will waste time counting to see which row you are on.  This will all make sense when you look at the chart.  It is one of my favorite stitches.

I hope your stitching is going well.

Peggy

Wednesday, July 14, 2010

A Coat fit for a Grum'e


Well isn't that a fine coat.  We have to add the torn bits and pieces as well as a few buttonholes, but here he is.  If you turn your canvas 1/4 turn, (with the stitching area on the bottom), it is easier to stitch the right side. The stitches go in the opposite direction from the stitches on the left side.  And it was not a problem that I put in the collar before the rest of the coat.  I could tuck the threads up under the collar.

Tuesday, July 13, 2010

A Coat for the Grum'e


I've completed the left side of the coat for the Grum'e.  It is a great area to practice your "laying thread" skills.  All rows have blended threads.  Some of them combine different colors of the same thread, and some combine different thread types.  Interesting effect.

Monday, July 12, 2010

Don't watch TV when you stitch the Vest!

The Grum'e  has a lovely brocade style vest.  And it looks really good if you lay the stitches in tight and straight.  It takes a little concentration to successfully complete it.  You can get into a rhythm,  but TV and husbands can be disruptive.You have another  opportunity here to use that new little flat iron.  I used it on both of the threads used in the vest.


Look closely at the right side of my vest.  I have a small compensated row.  I would rather not have that row, but it will stay in.  You can be aware of it and line it up on the right edge like Amy's.  Compare it to the picture with the guide.  I think it looks a lot better than mine.  Live and learn!

Have a great day, 
Peggy

Friday, July 9, 2010

The Groom's shoes.

The groom's shoes are a fun little stitch, but stitching black on black makes it a little harder.  Normally I would do the larger pattern first and then go back and fill in the small accent stitch. But I worked with both threads to fill in the accent as I went along.  That black on black is a struggle for most.  Don't forget to put something white in your lap to help you see the black canvas better.  I use a white pillowcase.  The picture is small because I don't want to give the stitch away to those who are not part of the club.  It's a copyright thing. 


Take a few minutes to cover the lines in the Groom's pants with that marker that was included in your kit.  The guide has us stitch over them with one of my favorite stitches.   Read the instructions carefully to make sure you don't cover the lines that aren't grey.  In this photo I have covered the correct lines.  The remaining white and off-white lines you see here will be stitched later.  I would suggest you do it one night when you are finished stitching for the day. That will give the ink plenty of time to dry before you stitch again.    


How about that tie.


I quickly stitched the Groom's tie.  And I started to work on the vertebra and ribs, but quickly realized I didn't have a good place to start or tie off, as the ribcage is open.  You must be careful not to let the thread travel behind the ribs.  I did the vertebra first starting at the top and going straight down.  Then I needed the lapels to bury threads for the ribs.  I may regret stitching the lapels before the coat as the lapels are "above" the coat.  But I will take a chance.  Happy Stitching!

Peggy

Wednesday, July 7, 2010

Spooky Guys


I  had two needles going as I did the sculls.  I had not done that on some of the other Characters.  It went much easier for me this way.  Amy provides a great chart to follow.  But if you get off a stitch or two, don't take it out.  It will still look good.  Also, see my favorite magnet.

Peggy

Tuesday, July 6, 2010

Groom's Hat

What a dapper hat.  I like the bright orange hat band.  As you start to do the top of the hat, take a good look at the picture on the front of the guide for the best placement of the first Hungarian stitch.  If you place it in the middle touching the orange band it will showcase the stitches well.  Please read the "Tip" at the bottom of page 5 before you work the hat.  It will really help you.

Peggy

Sunday, July 4, 2010

Neon Rays-Curling Iron


Well I got precious little done today.  But I did learn a great trick.  At one of Amy's spring Cook-Up classes a participant used a little curling iron to get the kinks out of Neon Rays.  Well I tired it on the Neon Rays for the Groom's teeth.  It works GREAT!!!  I hate pulling on Neon Rays to get the kinks out because it makes it thinner.  So this is the perfect solution.  Below is a tiny curling iron that I will now keep with my stitching supplies.  Who knew?!!

Thursday, July 1, 2010

The Groom Stitch Guide


All I have had time to do today is read the stitch guide...three times.  It is full of wonderful directions and great tips.  Big tip...stitch the shoes before stitching the gold and black line borders.  If I was just stitching along in the order the guide was written, I would have stitched those lines before turning the page to see the tip.  And this guide is huge.  I don't think it will be as difficult, as say Stirha Cal Dron, but there are a lot of directions.  There are referrals to past diagrams from other guides too.  You might want to pull those out and put them with this kit so it is ready when you get ready.   I have made a copy of the guide that I can write on and not worry about getting dirty.  I highlight the number of strands and the thread called for in each area in yellow.  Then I highlight the diagram number in pink.  That may be going a bit far,  but it helps me.  So it couldn't hurt.  I am really going to try to finish this guy this month.  I plan to do the background rings last and then stitch the same background on the bride right after that while I have the count in my brain. Don't forget to make a color photocopy of the canvas for placement purposes later.  (Then destroy the copy please!)

Here is Ethan looking over my shoulder.  If he wants to sit in my lap, he just puts a paw on my back and waits for me to clear a space for him.  When I say, "OK!" he gets in my lap.  Cool cat.

Monday, June 28, 2010

Here comes the groom.


Hello everyone.  Yes, the groom will be at your homes soon.  He is being fitted for his coffin,
er...shipping box, this week.   He is wearing his finest duds.  HE thinks he looks so cool.  We'll see what the bride thinks.   

I have been working on a piece for my second grand-niece.  It will be a Christmas present, and I decided to devote the rest of the month to getting it done.  She is currently 4 months old.  I visited her last night.  She was already in bed, so I spent a few minutes watching her sleep.  Her three year old sister likes to play hide and seek, but she asks you where she should hide while you are counting to 20.  She says her sister cannot yet count to 20 because she has no teeth.  Kids...you gotta love um.

Saturday, February 13, 2010

Weekend Stitching/Set little goals/Meet the Groom


As we move into this weekend, hopefully more people will be moving on to the walls of the Haunted House.  I can't stress how important it is to break the work into sections. That's the only way I could look at it without feeling overwhelmed.  There's a lot of house to stitch.   I urge you to needle up say six needles with each combination of threads.  It is so much easier to just tie off and slip the new needle in where you have just left off.  Plus it makes it easy to change  color combinations as you approach areas where  you would like the threads to be darker.  Does that make sense?   I have had a few arguments with the Lorikeet.  Remember Amy's tip in the directions.  And that's another reason to go on and strip a lot of Lorikeet at one time.  Grrr. Make sure you understand that each story of the house has a different stitch. It would be so easy to mindlessly repeat a pattern all the way to the roof.
Not that I think that any of you are "mindless"!